3

What does "Elevated" mean?

One of the differences between Vista and XP is the User Account Control (UAC) in Vista. The UAC controls who has access to what folders and files. A normal user account in Vista does not have administrator privileges. Some access requires administrator privileges, such as writing to files in the Program Files folder, accessing certain control panel applications and write to certain CSIDL folders - see my last blog about where to put data under Vista. For that, Vista requires elevation to administrator privileges and will prompt the user to elevate. The elevation prompts the user for permission to use the software or requests an administrator login.

Require elevation

The elevation requirement is controlled from within the software by the vista manifest. The Vista manifest is an XML file, just like the XP manifest, but with some additional branches, most notably the trustinfo branch. Below is the Vista manifest that we use for our Build Automator It is generated with our AddVistaManifest extension template in our Icetips Utilities.

<?xml version="1.0" encoding="UTF-8" standalone="yes"?>
<assembly
   xmlns="urn:schemas-microsoft-com:asm.v1"
   manifestVersion="1.0">
<assemblyIdentity
    processorArchitecture="x86"
    version="1.0.0.0"
    type="win32"
    name="BuildAutomator.exe"/>
    <description>Build Automator</description>
    <dependency>
    <dependentAssembly>
    <assemblyIdentity
         type="win32"
         name="Microsoft.Windows.Common-Controls"
         version="6.0.0.0"
         publicKeyToken="6595b64144ccf1df"
         language="*"
         processorArchitecture="x86"/>
    </dependentAssembly>
    </dependency>
<trustInfo xmlns="urn:schemas-microsoft-com:asm.v3">
    <security>
      <requestedPrivileges>
        <requestedExecutionLevel
          level="asInvoker"
          uiAccess="false"/>
        </requestedPrivileges>
       </security>
  </trustInfo>
</assembly>

The important part of the manifest is the RequestedExecutionLevel. The level attribute can have one of 3 possible settings:

  • requireAdministrator
  • asInvoker
  • highestAvailable

Normal programs should use asInvoker. Otherwise the program will prompt for elevation every time it is run and unless that is really required it should not be done. To force elevation of a program, the manifest should be set to requireAdministrator.

Running programs

In Clarion we have been able to use the RUN statement to run external programs without much problems. However, with Vista, a problem comes up if you want to run a program that either needs to be elevated by the program running it or the program to be run is using requireAdministrator. Either way it needs to be elevated.

Unfortunately RUN cannot handle this properly. The reason is that RUN uses the CreateProcess API internally and it cannot trigger the elevation process. If you try to use RUN to execute a program that requires administrator privileges is that nothing happens! This can cause support issues that are easily avoided.For that either ShellExecute or ShellExecuteEx must be used. In addition to that, if you want the calling program to wait for the called program you need to use WaitForSingleObject to force the process to wait.

Code sample

The following code sample is from our ITRun method in the ITShellClass of the Icetips Utilities. This is the main code that optionally elevates the program using the RunAs verb for ShellExecuteEx. It will also automatically trigger elevation if the called program uses requireAdministrator manifest.

    Verb = IT_SE_Open   !! Defaults to not elevated
    If Elevate
      If SELF.IsVista
        Verb = IT_SE_RunAs  !! Elevate to requireAdministrator
      End
    End
    !SELF.ODS('  Verb = ' & Verb)
    
    SHi.fMask                  =  IT_SEE_MASK_NOCLOSEPROCESS !!ULONG
    SHi.hwnd                   =  0{Prop:Handle}             !!IT_HWND       ! UNSIGNED
    SHi.lpVerb                 =  Address(Verb)              !!Long
    SHi.lpFile                 =  Address(cCmdLine)          !!Long
    SHi.lpParameters           =  Address(cParam)            !!Long
    SHi.lpDirectory            =  Address(P)                 !!Long
    SHi.nShow                  =  IT_SW_SHOWNORMAL           !!IT_int        ! SIGNED
    !SHi.hInstApp               =                            !!IT_HINSTANCE  ! UNSIGNED
    SHi.lpIDList               =  0                          !!IT_LPVOID     ! ULONG
    SHi.lpClass                =  0                          !!Long
    SHi.hkeyClass              =  0                          !!IT_HKEY       ! UNSIGNED
    SHi.dwHotKey               =  0                          !!IT_DWORD      ! ULONG
    SHi.DUMMYUNIONNAME         =  0                          !!Long          ! Pointer to union...
    !SHi.hProcess               =  !!IT_HANDLE     ! UNSIGNED
    SHi.cbSize                 =  Size(SHi) !!IT_DWORD       !! ULONG
    !SELF.ODS('  Before ShellExecEx')
    If Not SELF.ShellExecEx(SHi)
      hProc = 0
      SELF.ODS('  ShellExecEx failed in ITShellClass.ITRun.')
    Else
      hProc = Shi.hProcess
    End
    !SELF.ODS('  After ShellExecEx')
    If hProc
      If pWait
        RetVal = IT_WaitForSingleObject(hProc,-1)
        If IT_GetExitCodeProcess(hProc, lRetCode)
          RetValue = lRetCode
        Else
          RetValue = RetVal
        End
        RetVal = IT_CloseHandle(hProc)
      End
    End
    If Not cCmdLine &= NULL
      Dispose(cCmdLine)
    End

The WaitForSingleObject is called with a handle to the running process if you want the calling program to wait for the called program. The called program will wait and practically be completely dead until the called program is terminated. When that happens the next line of code uses GetExitCodeProcess to retrieve the exit code from the called program and places it into a variable that is returned from the ITRun method.

Running with the Icetips Utilities

With the Icetips Utilities it is very easy to implement the ITRun to make running programs under Vista a non-issue. First you need to add the Global Utilities extension to your application - also to the data dll, or exporting dll so the classes are included and compiled.

In your procedure data embed you add an instance of the ITShellClass:

ITS  ITShellClass

Now you are ready to use it in the procedure:

 Code
 ITS.ITRun('"C:\Program Files\Icetips Creative\' &|
           'Build Automator\BuildAutomator.exe"',True,'/E',,True)

That is all there is to it!

Running without...

To demonstrate this and show how you can do this easily, we have uploaded a small sample app written in Clarion 6.3. It uses some of the code in the Icetips Utilities methods to let you select a program and run it, with optional parameters and option to wait for the called program to terminate. It also has a button where you can use the standard Clarion RUN statement and observe the differences under vista. I would suggest that you try to run something that requires administrator privileges - most installers do - and see what happens when you use the RUN statement and when you use the ITRun procedure instead.

You can download the ITRun.zip from the Icetips website at http://www.icetips.com/downloadfile.php?FileID=89 Please note that this is a simple ZIP file. Unzip it to a folder and read the docs.txt file in it. Compile the application and run it and try out for yourself how it works.

We have used those methods to run elevated applications, for example Web Updates for Setup Builder installs, for several years without any problems. We hope this little app helps you to get your applications running under Vista.

Our Icetips Utilities mentioned here is a collection of classes and templates for Clarion developers. They are part of our Gold Subscription plan.

The Build Automator is a developer tool to automate compiling and building applications and installs. It works with many developer tools such as Visual Studio, Delphi/RAD Studio 2008, Clarion, SetupBuilder, Inno Setup, Setup Factor and MSI Factory.

Some Interesting Links:

UAC Elevation in Managed Code: Guidance for Implementing COM Elevation

We welcome and appreciate your comments on this entry:)

-- Arnor Baldvinsson

18

Running into the problem

I recently needed to figure out where to put datafiles when upgrading a client project. Part of the upgrade is to make the application Vista compatible. The files were stored in the application folder which was by default installed into Program Files. Under Vista that will not work because Program Files is read-only to all but administrator accounts.

When we released our Build Automator in May 2008 I had spent some time doing research on how best to deal with data file placement under Vista. Of course I had managed to forget most of that so I decided to dig into this again and write down what I found so I could have a future reference of what the conclusions were.

Vista's UAC

With Vista's User Access Control (UAC) Microsoft changed the way user access is granted. By default user accounts on XP could do pretty much whatever they wanted - they had administrator privileges by default. Under Vista this is not so. Regular user account does not have administrator rights. Even an administrator account does not have administrator privileges to everything and will be prompted to elevate to an administrator privileges for certain actions.

What is CSIDL?

To get a good view of the standard folders on a computer you can download our Special Folder program for free. When you run it, it will show you all the different special folders on your computer. The Special folders are generally referred to with various CSIDL names, such as CSIDL_Desktop, which is the desktop folder for the user or CSIDL_Personal which is the "My Documents" folder under XP and "Documents" folder under Vista. CSIDL stands for "constant special item ID list". For more information about individual CSIDL, visit this link.

In Vista, Microsoft changed the names of CSIDL to KnownFolderID. For more information about the KnownFolderIDs see:

http://msdn.microsoft.com/en-us/library/bb776911(VS.85).aspx
http://msdn.microsoft.com/en-us/library/bb762584(VS.85).aspx

The CSIDL and the shell API calls that work on XP and previous versions of Windows work just fine under Vista. On the the other hand, the KnownFolderIDs and it's shell API functions will not work under XP as the API calls require shell version 6.0.6000 or later. There are various API calls that can be used to get the folder information. Our Icetips Utilities contain simple methods to extract the folder information and at the end of this document I have put some simple code to use for this.

Where to put those pesky data files?

Location of data files on Vista has been a constant headache for developers. Should they be placed in CSIDL_COMMON_APPDATA, CSIDL_LOCAL_APPDATA, CSIDL_COMMON_DOCUMENTS or CSIDL_PERSONAL

Where exactly to place the files really depends on the nature of the data in my opinion. Is it for just the currently logged in user or is it for anyone on the computer? That may also need to be resolved when software is installed, i.e. is it for all users or just the user installing the software. That, in general, is the difference between the LOCAL and COMMON places. Just note that Microsoft did not use that naming convention on all the CSIDL values since for example CSIDL_PERSONAL is the LOCAL version of CSIDL_COMMON_DOCUMENTS!

Accessibility is another difference between those 4 folders. The CSIDL_COMMON_APPDATA works fine, but this folder is marked as hidden, and data in it is read-only to users that are not administrators or power users. That means that if users ever need to look for something in this folder, for example to e-mail a file to the developer, they may not be able to see it! It also can't be used by data that the application needs to write to, but is fine for data that it just needs to read. CSIDL_COMMON_DOCUMENTS is always visible. If the user never has to do anything with the files, including writing to them, CSIDL_COMMON_APPDATA is a perfect place to put it, but it gives all users on the PC read-only access to it.

Roaming

Vista, and older Windows versions also, have an option called Roaming. Several of the CSIDLs have Roaming counterparts. The roaming folders include for example the Start menu folders, cookies and network and printer shortcuts and CSIDL_APPDATA. Generally you should avoid the roaming folders unless you need to use them and you know what they mean and how to use them. Microsoft has an excellent document online about managing roaming and data deployment to roaming folders.

What to put in each folder?

Now let's explore the pros and cons of the four alternatives that we have, CSIDL_COMMON_APPDATA, CSIDL_LOCAL_APPDATA, CSIDL_COMMON_DOCUMENTS or CSIDL_PERSONAL.


CSIDL_COMMON_APPDATA


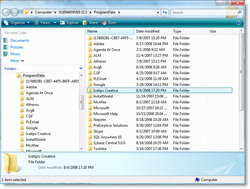
Vista: C:\ProgramData
XP: C:\Documents and Settings\All Users\Application Data

Suitable for application specific data that can be shared with all users and is provided by the developer and should only be updated by the administrator account or an elevated applictation. This folder is hidden so it is not visible in Explorer unless its settings are changed to show hidden and system files. All users have access to the data.

Of coures if you don't care if the user can view the datafiles, you can just as easily install them into CSIDL_LOCAL_APPDATA, but you still have the problem with the installer not knowing what folder is the actual user CSIDL_LOCAL_APPDATA. The perfect solution is to install default datafiles into CSIDL_COMMON_APPDATA and then let the application create a copy of those files in a matching folder structure in the CSIDL_LOCAL_APPDATA where each user has their own copy to start with.


CSIDL_LOCAL_APPDATA


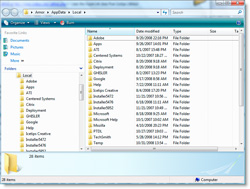
Vista: C:\Users\UserName\AppData\Local
XP: C:\Documents and Settings\User Name\Local Settings\Application Data

Suitable for application data that is completely contained within the application as can be read and written to. This folder is not hidden and the user can explore it at will. Only the currently logged in user has access to this folder.

This folder poses a problem for the installer because when it runs under the administrator account it does not know what the currently logged in user is. The trick above for CSIDL_COMMON_APPDATA applies, where you install the data into the common application data, then copy it from there to the local folder. Possible problem here is that the uninstaller may not be able to uninstall the copied files so they may be left behind - may not be a problem at all, but worth noting.


CSIDL_COMMON_DOCUMENTS


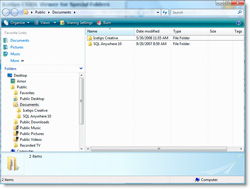
Vista: C:\Users\Public\Documents
XP: C:\Documents and Settings\All Users\Documents

Suitable for data that may need to be access by the users with both read and write access. All users have write access to this folder so it can be used for data sharing or file sharing between users.


CSIDL_PERSONAL


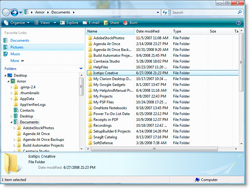
Vista: C:\Users\User Name\Documents
XP: C:\Documents and Settings\User Name\My Documents

Suitable for data that may be access by the user. Only the currently logged in user has access to this folder. Since this is the "Documents" or "My Documents" folder any folders that are placed here are immediately visible to the user when (s)he opens the documents folder. Lot of software uses this folder as a suggested place to put new projects (Visual Studio, Setup Builder and our Build Automator for example). There are certain risks involved in placing critical data here. For example if the user is cleaning up it is not difficult to imagine some folders being accidentally deleted. On the other hand, this folder is probably the most likely to be backed up since it normally contains valuable documents!

Put it where it belongs

In general, CSIDL_COMMON_APPDATA is the safest location for general database files that the user should never mess with, including write to. CSIDL_LOCAL_APPDATA should generally be used for data that the user needs to use. By using the common folder to install into and letting the application copy files to the local folder as needed you have a system that works very well. For data that may need more user access consider using the CSIDL_COMMON_DOCUMENTS for shared data and CSIDL_PERSONAL for user specific data.

Note that you can, from your program, open an explorer window for this location even though it is hidden - just like SpecialFolders does. That way your program can give the user access to explore this folder if they need to. You could perhaps supply a small exe that does only that - explore the data folder. If you are using our Icetips Utilities, all you would need in such a program is:

ITS ITShellClass
Code
ITS.ITShellExec(ITS.GetSpecialFolder(IT_CSIDL_COMMON_APPDATA),IT_SE_Explore)

This will open an Explorer window on the ProgramData folder under vista. If you wanted to open it to a subfolder you would simply use something like this:

ITS ITShellClass
Code
ITS.ITShellExec(ITS.GetSpecialFolder(IT_CSIDL_COMMON_APPDATA) & '\Icetips Creative',IT_SE_Explore)

This way you can easily provide a very simple solution to your users to explore the otherwise hidden ProgramData folder. However, you should only do this if you have to, this simply shows you a way to deal with it if the need comes up. Of course you could use different methods, such as a program that emails you the files for investigation or does something else. I'm simply pointing out that just because this folder is hidden from the user by default in Vista it should not discourage you to use it to store application data!

Now that we have looked through the pros and cons of each of those folders, I hope this entry will help you to decide which one to use. I also hope it explains a little bit about why you should use this folder rather than the other.

Our Icetips Utilities mentioned here is a collection of classes and templates for Clarion developers. They are part of our Gold Subscription plan.

The Build Automator is a developer tool to automate compiling and building applications and installs. It works with many developer tools such as Visual Studio, Delphi/RAD Studio 2008, Clarion, SetupBuilder, Inno Setup, Setup Factor and MSI Factory.

--Arnor Baldvinsson

Couple of weeks ago I disabled the screensaver on my new Vista 64bit machine because it was popping up when I was installing XP into VMware virtual machine. Yesterday I enabled it again and this morning I realized that it wasn't kicking in at all. I had it set to show my photos and to show up after 5 minutes of inactivity. The preview worked fine, but the screensaver did not kick in at all.

I started digging around and found that this is caused by incompatability between the IntelliPoint driver and Vista. Well, last week I had installed a Microsoft Wireless Notebook Optical Mouse 4000, which I now use on all my computers (I LOVE that mouse!) and the IntelliPoint driver that came with it.

After some searching, I found a knowledgebase article on the Microsoft website suggested to check for updates and install a "Microsoft HID Non-User Input Data Filter" update. So I did and the update was there and I updated the Vista64 with it. That completely fixed the screen saver.

If your screensaver stops working on Vista or Vista 64, check out if you need this update! Hope this helps someone:)

--Arnor Baldvinsson