Working with menus


|
Working with menus |


|
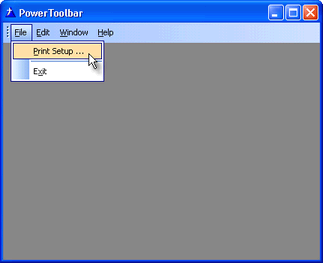
In this tutorial you learn how to set up the Clarion menu and override with PowerToolbar. Please note that the menu themes do NOT work in Clarion 7 and the PowerToolbar template automatically turns them off. See the Limitations topic for more information. As of Build 2.0.163 menus can again be themed in Clarion 7 and Clarion 8.
When working with the Clarion menu you must obey the following limitations:
![]() If you choose to override the main Clarion menu you can NOT have (merging) menus in any child windows.
If you choose to override the main Clarion menu you can NOT have (merging) menus in any child windows.
![]() All items in menu must have a Use-variable set
All items in menu must have a Use-variable set
![]() All font colors must be COLOR:NONE
All font colors must be COLOR:NONE
![]() Width must be "default" on all items
Width must be "default" on all items
![]() Height must be "default" on all items
Height must be "default" on all items
![]() Top level menu-items is not supported
Top level menu-items is not supported
![]() Runtime added top level-menus is not supported
Runtime added top level-menus is not supported
The finished application for this tutorial can be found at: Clarion6\3rdParty\Examples\PowerToolbar\MenusTutorial.app
Part 1 - Populate templates |
![]() Create a new application
Create a new application
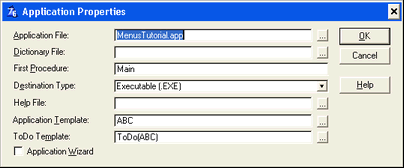
![]() Add the global PowerToolbar template
Add the global PowerToolbar template
![]() Add AppFrame
Add AppFrame
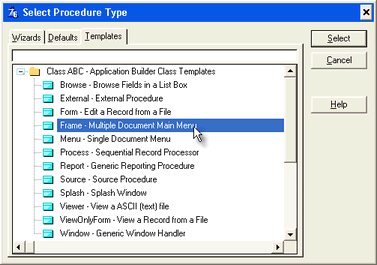
![]() Double-click the Main(Todo) procedure to bring up the "Select Procedure Type" dialog.
Double-click the Main(Todo) procedure to bring up the "Select Procedure Type" dialog.
![]() Select "Frame - Multiple Document Main Menu"
Select "Frame - Multiple Document Main Menu"
![]() Create the window
Create the window
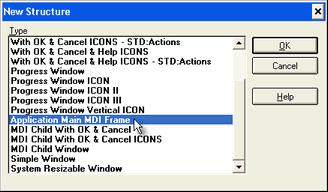
![]() Click the Window button
Click the Window button
![]() Select "Application Main MDI Frame" and click OK. This will bring up the window formatter.
Select "Application Main MDI Frame" and click OK. This will bring up the window formatter.
![]() Create a toolbar
Create a toolbar
![]() Select the menu-item "Toolbar -> New Toolbar"
Select the menu-item "Toolbar -> New Toolbar"
![]() Populate PowerToolbar control
Populate PowerToolbar control
![]() Click the "Control Template" toolbutton
Click the "Control Template" toolbutton
![]()
![]() Choose the template "POToolbar - Toolbar Control"
Choose the template "POToolbar - Toolbar Control"

![]() Click somewhere inside the Clarion toolbar or Window to place the PowerToolbar-control.
Click somewhere inside the Clarion toolbar or Window to place the PowerToolbar-control.
Part 2 - Set up the menu |
![]() Double-click the menu band to open the menu editor
Double-click the menu band to open the menu editor
![]() Place use variable on all items
Place use variable on all items
![]() You must make sure that all items in the menu has a use-variable.
You must make sure that all items in the menu has a use-variable.
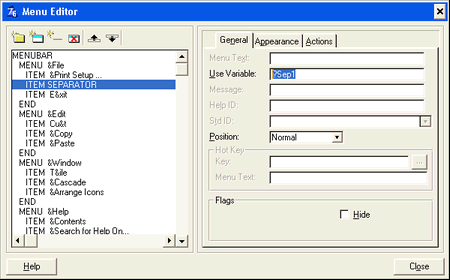
![]() In the default menu there is one separator without use-variable. Set it to ?Sep1
In the default menu there is one separator without use-variable. Set it to ?Sep1
![]() Add submenu
Add submenu
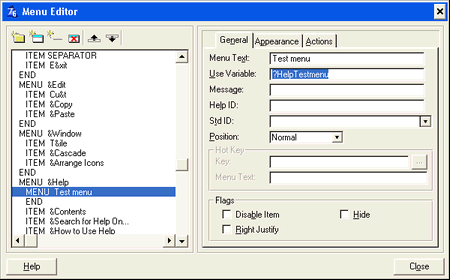
![]() Add a submenu under the "Help"-menu by clicking
Add a submenu under the "Help"-menu by clicking ![]()
![]() Make sure the new item get's a use-variable. By default it doesn't.
Make sure the new item get's a use-variable. By default it doesn't.
![]() Add sub-menu item
Add sub-menu item
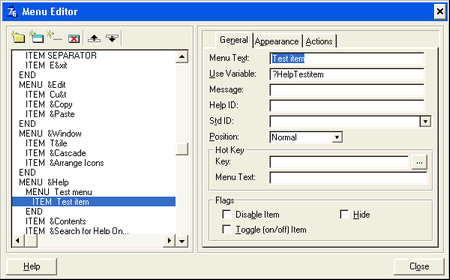
![]() Add a submenu-item under the newly created submenu by clicking
Add a submenu-item under the newly created submenu by clicking ![]()
![]() Set icon
Set icon
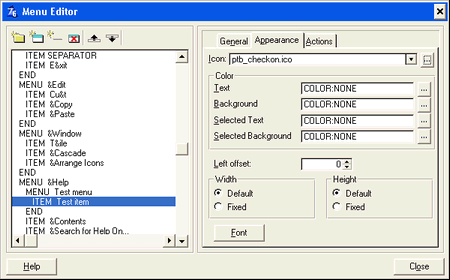
![]() Select the "Appearance"-tab
Select the "Appearance"-tab
![]() Choose your favourite icon (16x16) by clicking the "..." button next to the Icon-prompt.
Choose your favourite icon (16x16) by clicking the "..." button next to the Icon-prompt.
![]() Click the "Close" button to accept the menu changes and get back to the window formatter.
Click the "Close" button to accept the menu changes and get back to the window formatter.
Part 3 - Toolbar settings |
![]() Right-click the PowerToolbar control, and select "Actions"
Right-click the PowerToolbar control, and select "Actions"
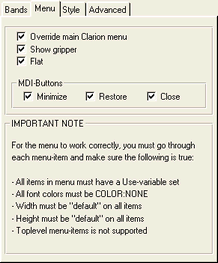
![]() Select the "Menu" tab
Select the "Menu" tab
![]() Click the "Override main Clarion menu"-checkbox
Click the "Override main Clarion menu"-checkbox
Part 4 - Try the application |
![]() Compile run your application
Compile run your application
![]() Make sure the icon for the item we added shows. If it's missing or placed on the wrong item, you probably got a menu-item without use-variable.
Make sure the icon for the item we added shows. If it's missing or placed on the wrong item, you probably got a menu-item without use-variable.
